Windows Registry
DO NOT CHANGE ANYTHING IN THE REGISTRY IF YOU DON'T KNOW WHAT YOU'RE DOING, YOU MIGHT END UP DOING IRREPARABLE DAMAGE TO WINDOWS!
The material you're going through here is designed to get you simply acquainted with some (but not all) artefacts found in the Windows registry. Later on in the module, you will be doing more in-depth analysis using specialist tools, such as Autopsy. Having advanced knowledge, then, of what is available in the Windows registry and what is of investigative value, will prove useful.
To access your Windows registry (ideally on your own PC rather than campus PCs), you'll need to execute regedit.exe. You can do this a few different ways:
- Hit the Windows-logo key on your keyboard, and just start typing
regedit, launch the found application with elevated privileges ("Run as administrator") - Open a Windows command prompt (
cmd), by following the same procedure in 1. above to elevate your privileges, then typeregeditto start the application
On campus machines, you might not be able to launch regedit with elevated privileges. If the method in 1. above doesn't work, try the second method in 2. without trying to elevate your privileges. You should be able to at least look at the registry.
- Go through each hive
- Expand each hive and explore keys and subkeys
- Locate the hive
HKEY_CURRENT_USER - Locate
Softwarewhich should give you a list of all the installed software - Drill down into each software listed and have a look if there are any differences
Windows MRU
Microsoft of course tries to make the use of Windows as comfortable as possible for their customers, so they always add a bunch of convenience functions into their products. On Windows, one of the earlier advancements was the introduction of the Most Recently Used (MRU) files and folders. The concept is simple, Windows remembers what you had accessed a while back so that when you want to find what you were working on, you'll get there faster.
Of course, this information is also very useful in investigations. If you have MRU active (which should be the case by default), you'll find the registry key here: HKEY_CURRENT_USER\Software\Microsoft\Windows\CurrentVersion\Explorer\RecentDocs
You should see something similar to this:
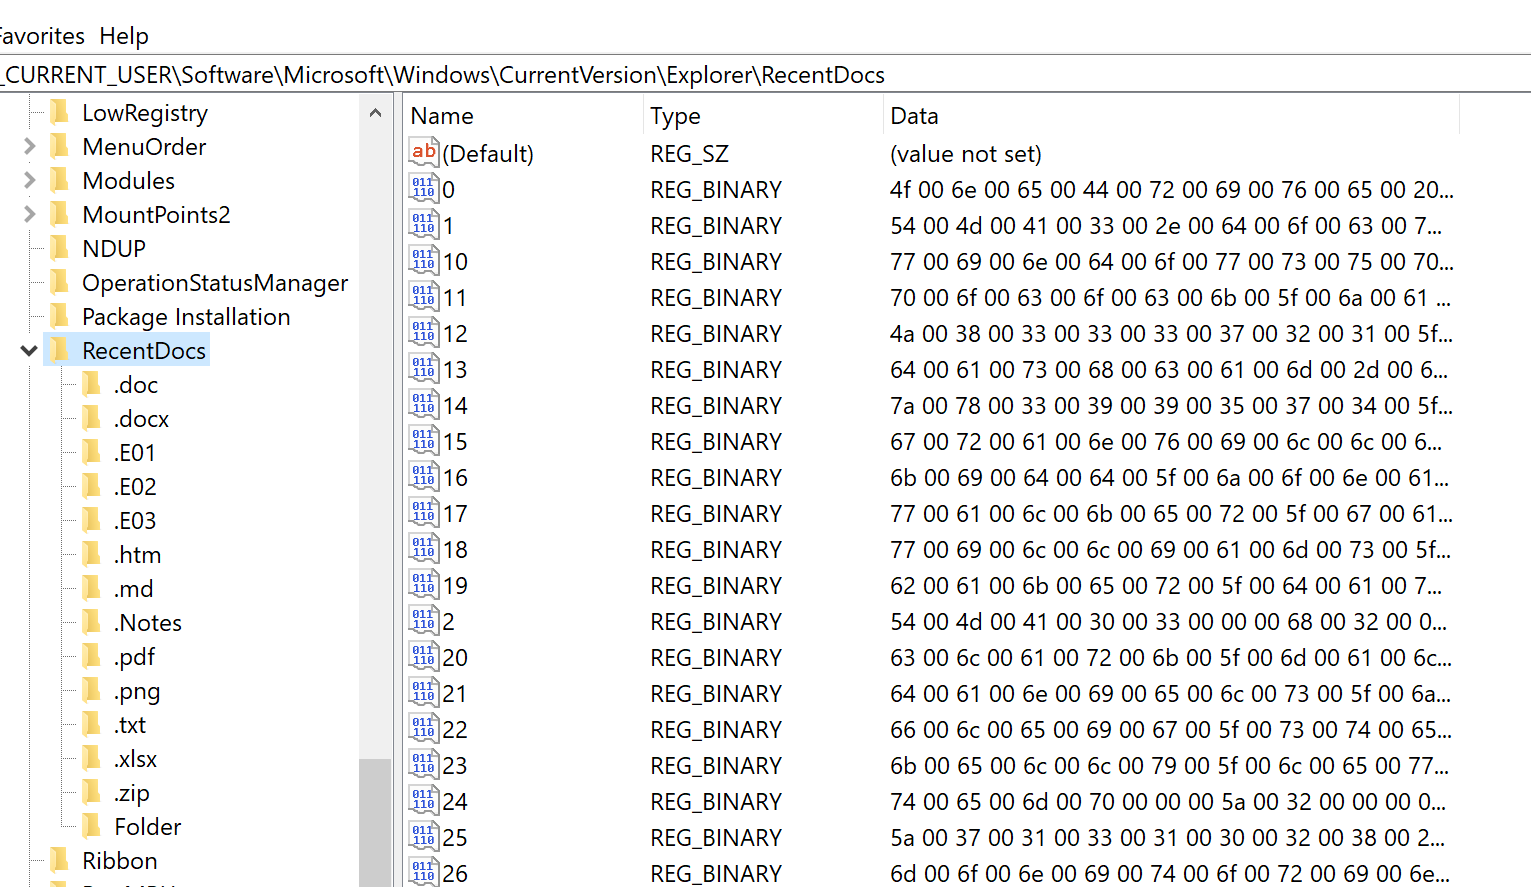
If, like in the screenshot, you've expanded the RecentDocs tree, you'll notice that there are is a bunch of hex encoded information associated with each entry in the right pane. When you double-click on an entry, you'll be presented with an editor that shows you the hex, and the ASCII equivalent, to the right. That's also where you'll find which file this entry is pointing to.
Jump Lists
Continuing the theme of convenience for Microsoft's customers, we also have Jump Lists at our disposal. Jump Lists are also on by default, and are particularly useful because they store per-user information on opened documents.
In digital forensics (or any forensics), you want to be able to attribute certain events to the person being investigated (or show that there is no attribution). For that, you'll want to collect as much meaningful evidence as possible. Certain artefacts carry more weight than others. Jump Lists have a lot of weight but, of course, they can't prove 100% that a user carried out a certain activity. Nonetheless, they provide a strong indicator.
Jump lists also come in two flavours: automatic and custom. The former are created during the user's everyday actions on the system, and the latter are created when a user pins a file to either the Start Menu or the Task Bar.
You can check your Jump List files using Windows Explorer (remember to turn on "Hidden Files"): C:\Users\yourUserName\AppData\Roaming\Microsoft\Windows\Recent Items\
Windows UserAssist Settings
This feature is very useful, particularly because it keeps track of which applications have been executed by a user. By default, it should have recorded your activity in your registry (unless you've turned it off).
- Open
regedit - Click on
Computerto make sure you've highlighted the root of the hive tree - Click on "Edit" and then "Find...", or hit CTRL+f
- Type
UserAssistin the search box - Ensure only
KeysandMatch whole string onlyare ticked - Click on
Find Next
There are a number of UserAssist entries present in the registry. Pay attention (and take notes) on which ones you found. Start exploring the entries, and you'll probably notice that some entries of Type REG_BINARY look weird.
Can you figure out why?
Windows Time Zone Settings
This setting is very crucial to investigators, as you can probably imagine. The main focus, of course, is ensuring that all timestamps on the system are interpreted correctly.
- Open
regedit - Navigate to
Computer\HKEY_LOCAL_MACHINE\SYSTEM\ControlSet001\Control\TimeZoneInformation
You'll see details that are important to an investigation. As you've now refreshed your understanding of hexadecimal, and binary, the data stored with each setting should not be difficult for you to decode.
Particularly of interest are:
ActiveTimeBiasBiasDaylightBias
ActiveTimeBias
It doesn't matter if daylight saving is being observed or not, this value holds the current time difference, in minutes, between local time and UTC, and therefore helps establish the current time zone.
Bias
This value holds the normal difference from UTC in minutes when daylight saving is not observed. If the system is set to UK time, then this value will usually be zero due to the UK residing in the GMT time zone. What this value holds, when not zero, is therefore the number of minutes that would need to be added to the local time to arrive at UTC time.
DaylightBias
This value, when daylight saving is observed, specifies by how much the local time should be adjusted to arrive at the local time that doesn't include daylight saving. This value is added to the value of the Bias member to form the bias used during daylight time. In most time zones the value of this member is -60 (converted from 0xFFFFFF4C and applying two's complement).
It is calculated based on the values of the StandardBias, DaylightBias, and Bias values, and if StandardBias (which is zero in most time zones) is used.
When Daylight Saving Time (DST) is being observed, the calculation is: ActiveTimeBias = Bias + DaylightBias
When DST is not observed, the calculation is: ActiveTimeBias = Bias + StandardBias
UTC, local time, and ActiveTimeBias can also be used for converting between local time and UTC, for example:
- UTC = local time +
ActiveTimeBias - local time = UTC -
ActiveTimeBias
And, of course, ActiveTimeBias can be calculated using UTC and local time:
ActiveTimeBias= UTC - local time
DaylightName
This value is used by Windows to show the current time zone setting.
DaylightStart
This value is used by Windows to record when daylight saving will come into force for the time zone the system is configured in.
StandardName
This value holds the current time zone setting when daylight saving is not active.
StandardStart
This value holds when standard time will commence in the time zone the system is configured in.
DynamicDaylightTimeDisabled
This is a boolean value that indicates if daylight saving is applied.
TimeZoneKeyName
Which time zone is configured can, depending on the version of Windows, also be read from this value. This value also takes precedence over StandardName, so if you're ever confronted with values in StandardName and this one, this one should be used, otherwise StandardName should be used.
Dynamic DST
This value depends on which timezone the machine is in. It's designed for those edge cases where some countries start observing daylight on a different day of the year.