Session 01 - USB-only Live-environment
Requirements
- A PC or Mac running Windows, Linux, or macOS
- 1 USB stick (at least 16GB storage capacity)
Download the live image from https://www.kali.org/get-kali/#kali-live.
It is suggested that you use the Everything Kali image (left) and download it either directly or using a torrent client (which is probably faster).
01 Prepare the USB Stick
You now need to transfer the ISO to the USB stick. This depends on the operating system you're using.
On Windows
- Download "Rufus" from here: https://rufus.ie/en/
See instructions below the pictures.
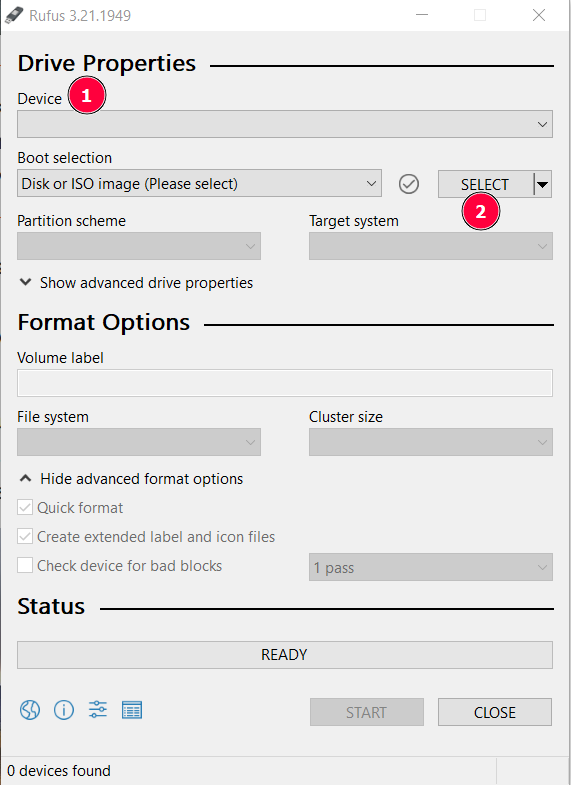
- If not already done, plug in your USB stick and select your USB stick from the "Device" List (if Rufus hasn't done so for you already)
- Click on "SELECT" and choose the image you downloaded earlier
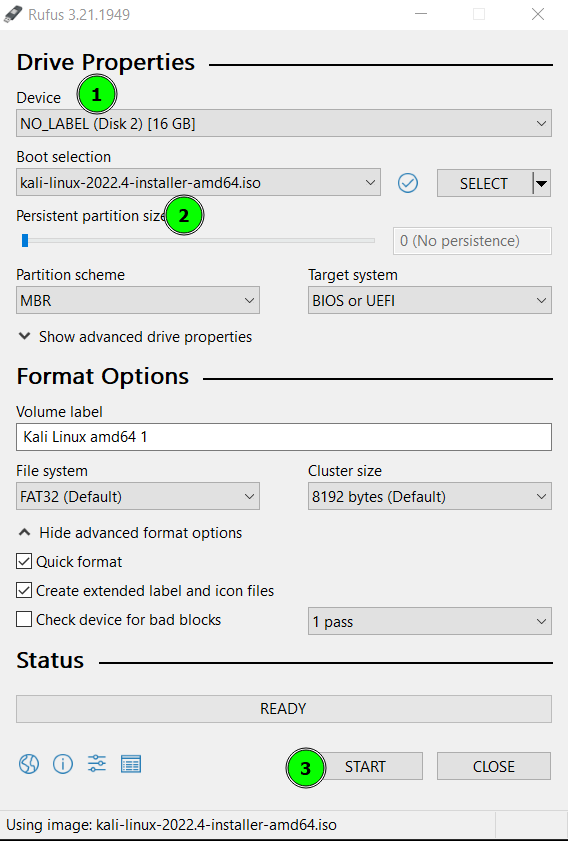
Rufus will populate the settings, but ensure that:
- The USB stick is listed in the "Device" section
- The correct ISO image file is selected
- Click START once satisfied
After a few minutes you should have a USB stick ready for use.
On macOS
There are various ways to write an ISO image to a USB stick, but the most straightforward is probably to use UNetbootin, which you can download here: https://unetbootin.github.io/
- Launch UNetbootin once downloaded
- Click on Diskimage and click on the "..." button to select the ISO image downloaded previously
- Ensure that your USB stick is listed under Drive
- Click on OK to start the writing process
On Linux
The most straightforward way is to use DD.
- Open a terminal
- Change directory to where you downloaded the ISO image (e.g.,
cd ~/Downloads) - Write the image to the USB stick:
sudo dd if=kali-linux-YYYY.N-installer-amd64.iso of=/dev/sdX bs=64k status=progress
- Make sure that you are referencing the correct ISO file you downloaded (e.g., kali-linux-2022.4-installer-amd64.iso)
- Make sure that you're referencing the correct device identifier to write the image to (e.g., replace X in
sdXwith the appropriate letter for the USB stick; double check which letter to use by callingdmesgin the terminal)
Test the Live-environment
Either reboot your PC/Mac, or use the USB stick on another machine to test that it worked.
- Make sure the PC/Mac you want to run Kali on via USB, is powered off
- Insert the USB stick into the PC/Mac's USB port
- Power on the PC and immediately start repeatedly pressing the key responsible for activating the boot menu (this might be F11 or F12, or something else, in which case you'll have to look up your PCs manual and find out how to get to the boot menu)
- From the boot menu, select the USB stick
- After a little while you should have a fully-functioning USB-only live-environment ready